
Configure conversation flow
Match languages, direction, processing behavior, hints, voice, and audio devices to the people in the call.
Define who speaks and who hears translation
Start with the people, not the controls. Identify which language you will speak, which language the other participant will speak, and whether one or both sides require translated audio. Then keep the physical microphone, calling application, and speaker route unchanged while testing. This baseline prevents a routing mistake from being misdiagnosed as a language or voice problem.
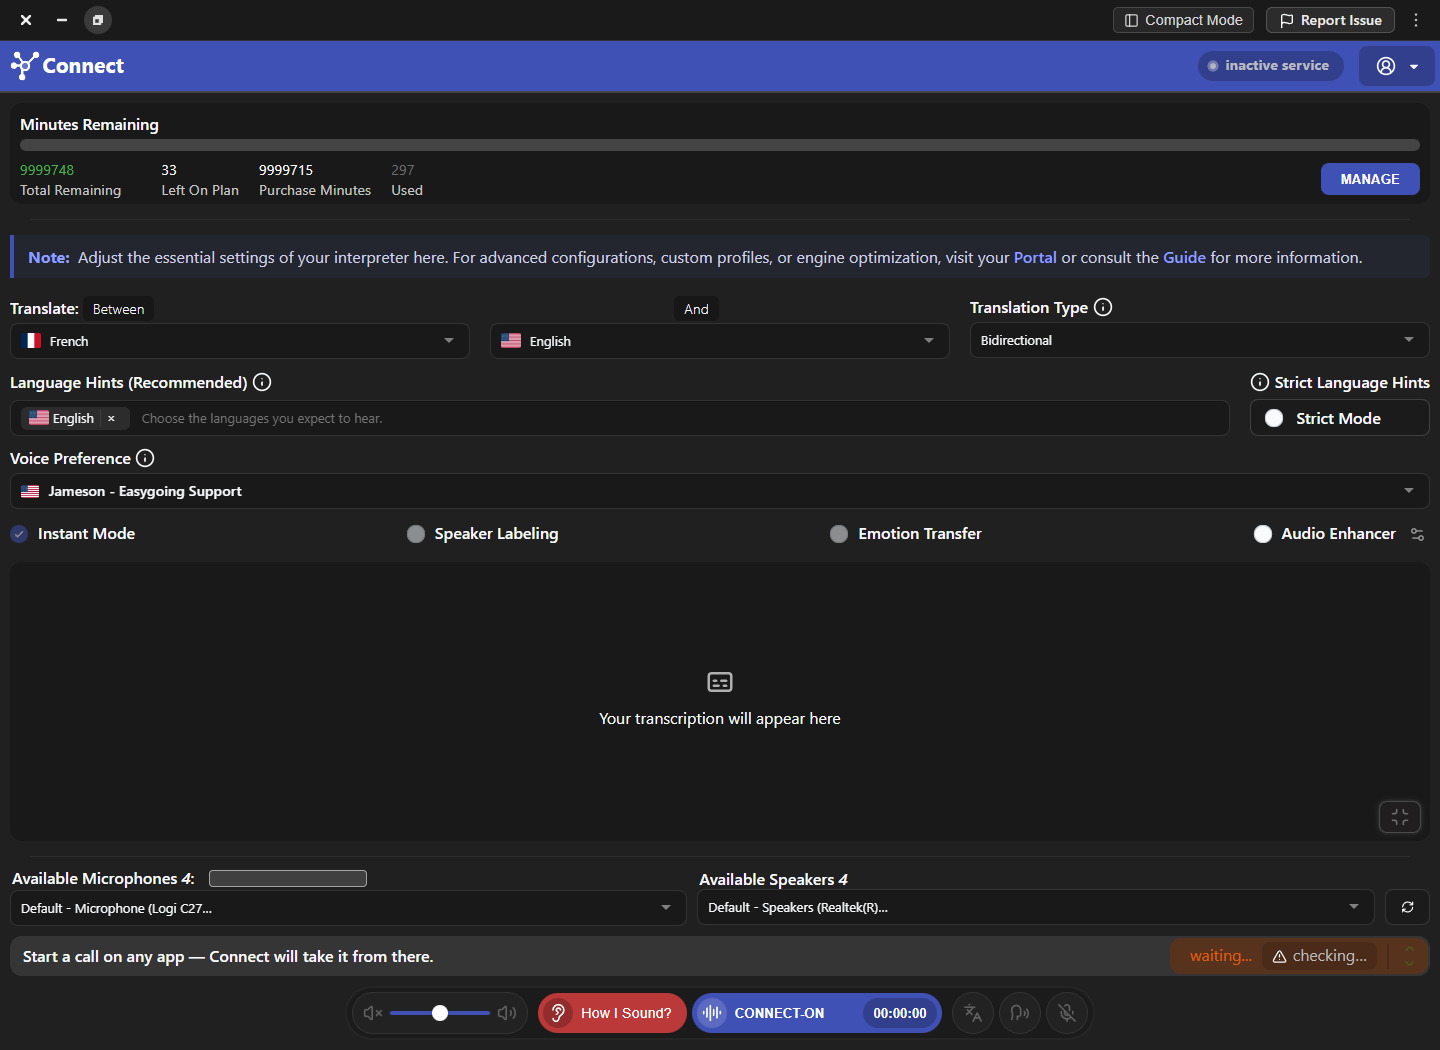
- Between: choose the two actual conversation languages.
- Translation Type: decide whether audio travels in one direction or both.
- Microphone: choose the physical headset mic that captures your voice.
- Speaker: choose the physical device you will monitor without creating an echo loop.
Choose the translation direction
Use the simplest direction that meets the conversation’s needs. Unidirectional translation processes one side, while Bidirectional translation also returns translated incoming speech. A reverse option swaps the source direction without requiring the language fields to be rebuilt. After changing direction, recheck the call application’s microphone and speaker because the required virtual path can change.
| Mode | Use it when | Validate |
|---|---|---|
| Unidirectional | Only your outgoing voice needs translation. | The recipient hears translation; you hear the original return audio. |
| Reverse | Only the other side needs processing in the opposite direction. | The intended speaker is captured and the untouched side remains natural. |
| Bidirectional | Both participants need translated speech. | Each direction is tested separately before normal conversation. |
Balance speed and natural pacing
Processing mode changes how quickly Connect releases translated speech and how much context it can use before speaking. Instant Mode favors low delay and works well with short, deliberate turns. Streaming quality preferences can favor natural delivery or speed. Keep the same test sentence, network, and voice when comparing modes so the timing difference is meaningful.
- Instant Mode: use short turns and clear pauses when fast response matters.
- Streaming behavior: speak naturally and avoid restarting a sentence mid-phrase.
- Natural quality: allow slightly more time for a smoother result when the call permits it.
- Fast quality: prioritize responsiveness, then confirm that names and sentence endings remain intelligible.
Guide recognition without overconstraining it
Language hints should describe what participants are likely to speak, while the selected voice controls generated delivery. Add only relevant languages and enable strict hints only when the conversation is predictable. Choose a voice that supports the target language and preview it before the call. A pronunciation dictionary or context profile should handle specialist vocabulary instead of overloading language hints.
Add enhancements one at a time
Speaker Labeling, Emotion Transfer, and Audio Enhancer solve different problems. Enable one feature, repeat the same phrase, and compare the remote result before enabling another. Features can be limited by plan or administrator policy, and extra processing can complicate latency or audio diagnosis. A clean route with no optional enhancement is the safest baseline.
- Speaker Labeling: separate speakers in a transcript when several people participate.
- Emotion Transfer: preserve more of the original delivery when the account supports it.
- Audio Enhancer: clean difficult input, but disable competing enhancement in the calling application.
- Strict Language Hints: constrain detection only for a known, stable language set.
Validate the complete route
A successful preview is not enough. Place a short call with a cooperative recipient, test one direction at a time, and leave clean pauses between turns. Ask the recipient to describe what they hear rather than asking only whether it “works.” Confirm clarity, language, delay, duplicate audio, and whether original audio leaks into the translated path.
Frequently asked questions
These answers clarify the decisions that most often affect this workflow. Keep the working microphone, speaker, language pair, and call route unchanged while testing a feature, and return to the simplest verified baseline whenever several simultaneous changes make the result difficult to explain.
When should I use unidirectional translation?
Use it when only one side needs translated speech. It creates a simpler route and is easier to validate for presentations, outbound support, or announcements.
When should I use bidirectional translation?
Use it when both participants need translated audio. Test each direction separately and avoid overlapping speech during validation.
Should Strict Language Hints always be enabled?
No. Start with ordinary hints. Strict hints are useful only when the expected languages are known and stable.
Should every enhancement be enabled?
No. Begin with a clean baseline and enable only the feature that solves a demonstrated need.
Support
Need help? Get in touch with our Support Team for assistance. Include the feature, operating system, calling application, selected microphone and speaker, language direction, and the exact step that failed. Describe the expected result and what happened instead without including passwords, private call content, or unnecessary personal data.
Was this article helpful?