
Create a clean voiceprint
Capture a short, representative sample and validate that the generated voice remains clear, natural, and appropriate.
Prepare a clean recording environment
A voiceprint learns from the audio it receives, including pacing, volume, room noise, and microphone artifacts. Use a quiet room, one speaker, and a stable boom microphone near the corner of the mouth. Speak in the same language and natural style you expect to use with the voice, and avoid music, other speakers, reverberation, or aggressive automatic processing.
- Position: keep the microphone close enough for a strong voice but outside the direct breath path.
- Level: use a steady conversational volume without whispering or shouting.
- Content: include varied sounds and complete sentences in the selected language.
- Privacy: record only the consenting speaker and avoid customer or confidential information.
Complete the Voice Library form
Open Portal → Voice Library → Add Your Voiceprint. Give the voice a descriptive name, select the recording language, and add a short description that distinguishes it from variants. Upload or record the supported short sample, then decide whether background-noise removal is appropriate. Listen to the source clip before creating the voiceprint; a poor sample should be re-recorded, not repaired later.
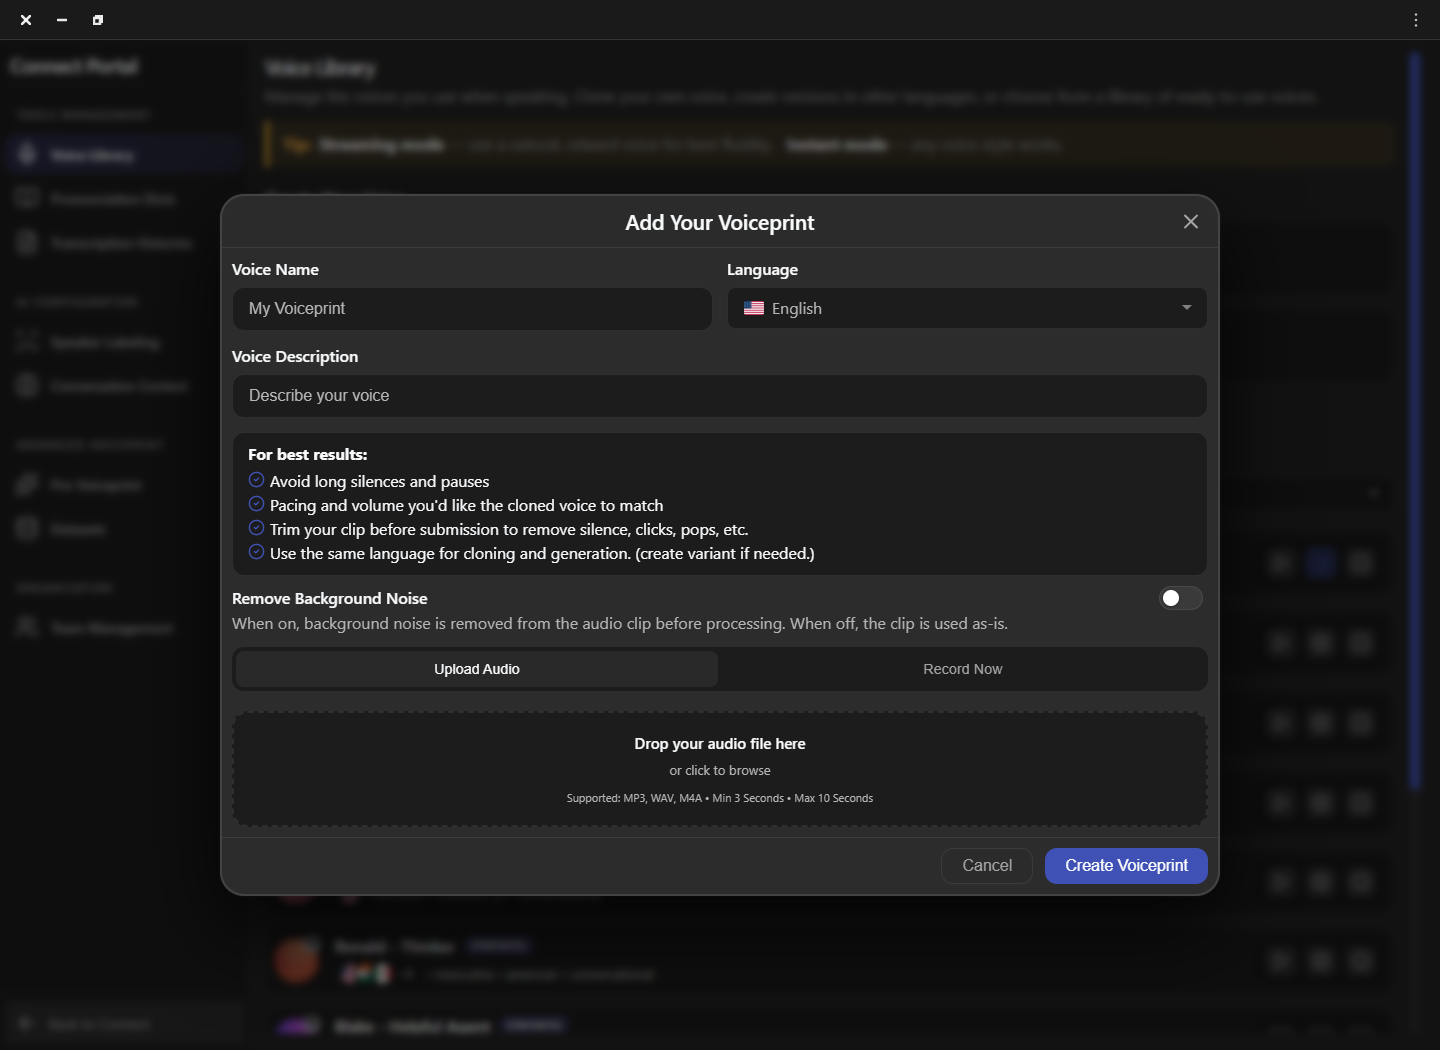
Reject weak audio before submitting
Listen from the beginning to the end with headphones. Reject clips with long silence, clipping, pops, keyboard noise, changing microphone distance, or a second speaker. Noise removal can help with light steady noise, but it cannot restore distorted speech or separate overlapping voices. Trim unused silence and keep the vocal character you want the generated voice to reproduce.
Use Pro Voiceprint only for the right source
Pro Voiceprint is a separate, advanced workflow that fine-tunes a model from a larger single-speaker dataset. The application recommends at least 30 minutes of clean audio, with more material improving coverage, and advises splitting long recordings into several files. Review the credit cost shown in the Portal before training and confirm that the speaker has consented to this use.
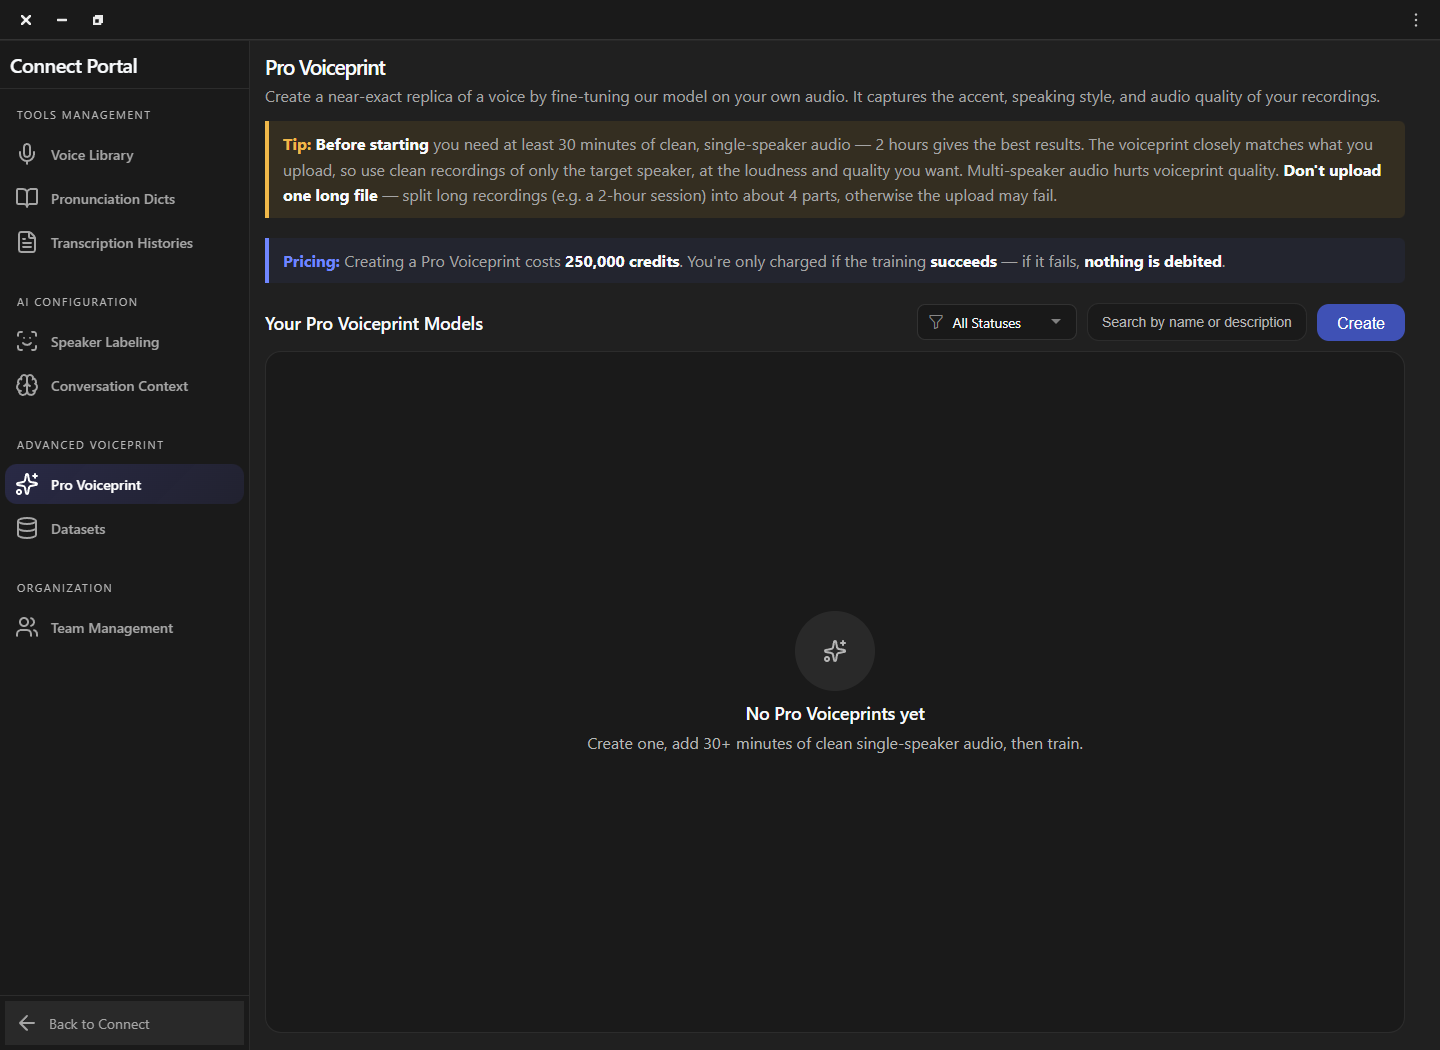
Preview and compare the result
Preview the created voice with a neutral sentence that contains short and long words, numbers, and a name. Compare it with a synthetic voice using the same target language and processing mode. Keep the voice only if intelligibility, pacing, and identity remain acceptable without adding excessive enhancement. Then place a short test call before using it with customers.
Frequently asked questions
These answers clarify the decisions that most often affect this workflow. Keep the working microphone, speaker, language pair, and call route unchanged while testing a feature, and return to the simplest verified baseline whenever several simultaneous changes make the result difficult to explain.
How long should the standard sample be?
Follow the limits shown in the current Add Your Voiceprint dialog. The observed build accepts a short sample and displays its minimum and maximum duration.
Should I enable background-noise removal?
Enable it for light, steady noise only after comparing the original. Re-record audio that clips, contains another speaker, or changes level significantly.
What is the difference between standard and Pro Voiceprint?
The standard workflow creates a voice from a short sample. Pro Voiceprint fine-tunes from a much larger clean single-speaker dataset and can require credits or a higher plan.
Can I use a recording of another person?
Only with that person’s informed permission and the necessary rights. Never clone a voice deceptively or from private call audio.
Support
Need help? Get in touch with our Support Team for assistance. Include the feature, operating system, calling application, selected microphone and speaker, language direction, and the exact step that failed. Describe the expected result and what happened instead without including passwords, private call content, or unnecessary personal data.
Was this article helpful?